

Terminology
- MR - Magic Ring
- ch/chs - Chain/Chains
- dc - Double Crochet
- sc - Single Crochet
- hdc - Half Double Crochet
- sl st - Slip Stitch
- st/sts - Stitch/Stitches
Supplies Needed
- About half a skein of any yarn that is light worsted or worsted weight in any color. This yarn will make the entire slipper except for the white tip and the white logo on the side so choose the color of this yarn based on whatever color you want the whole slipper to be. (I used I Love This Yarn! by Hobby Lobby in Amethyst for the main part of the slipper. Any yarn in any weight can be used, but smaller or thicker yarn will affect the size of the slipper which would have to be taken into account when following this pattern.)
- About an eighth of a skein of white yarn that is light worsted or worsted weight. This yarn will be used for the white tip of the slipper, the white circle emblem on the side, and sewing the circle emblem on. (I used I Love This Yarn! by Hobby Lobby in White. Whatever weight of yarn you choose for your main color should be the same weight and type of yarn for this white yarn so that the stitch size is consistent throughout the whole slipper.)
- A small amount of light worsted or worsted weight black yarn. This yarn will be used for making the black star on the white circle emblem. (I used an old scrap of black yarn I had laying around, I don't know exactly what brand it was but I believe it was Red Heart Super Saver yarn.)
- A G 4.0 mm crochet hook. (I typically use a crochet hook that is one size smaller than the yarn I am working with suggests to use because it makes the stitches a little bit tighter and neater looking. It's really up to you what size you use but stay close to what size the yarn you are working with recommends or else your slipper might end up being too loose and stretchy because the crochet hook is too large.)
- A pair of white shoe laces. (The shoe laces I used where 50 inches long. I would recommend making both slippers, and then measuring how long you want the shoe laces to be.)
- A stitch marker.
- A yarn needle for weaving in the ends of the yarn.
Notes
- I would recommend having some basic crochet skills and having some practice before attempting this pattern because I would consider this pattern an intermediate level pattern!
- For this entire pattern, crochet into and pick up both loops of a stitch.
- Put stitch markers in the first created stitch when working in the round as to indicate that the slip stitch to end the round will go into the stitch with the stitch marker.
- At the end of each row or round, the total number of stitches for that row or round are in parenthesis.
- At the end of round 4, there is a color change. I use NeedleNoodles jogless color change method #2 that you can learn how to do here. I would recommend practicing that before you do it on the slipper!
- There are a few techniques that I use in this pattern because it was the way that it worked best for me when I was making the slippers. I am not an expert, and I'm not saying it is the right way or the only way, it was just the way that worked for me. So if you have another way (or a better way) to do any aspects of this pattern, do whatever works for you and use this pattern just as a guide!
- The instructions below will make one slipper, you will have to repeat all the instructions for the second slipper.
Converse Slipper Crochet Pattern
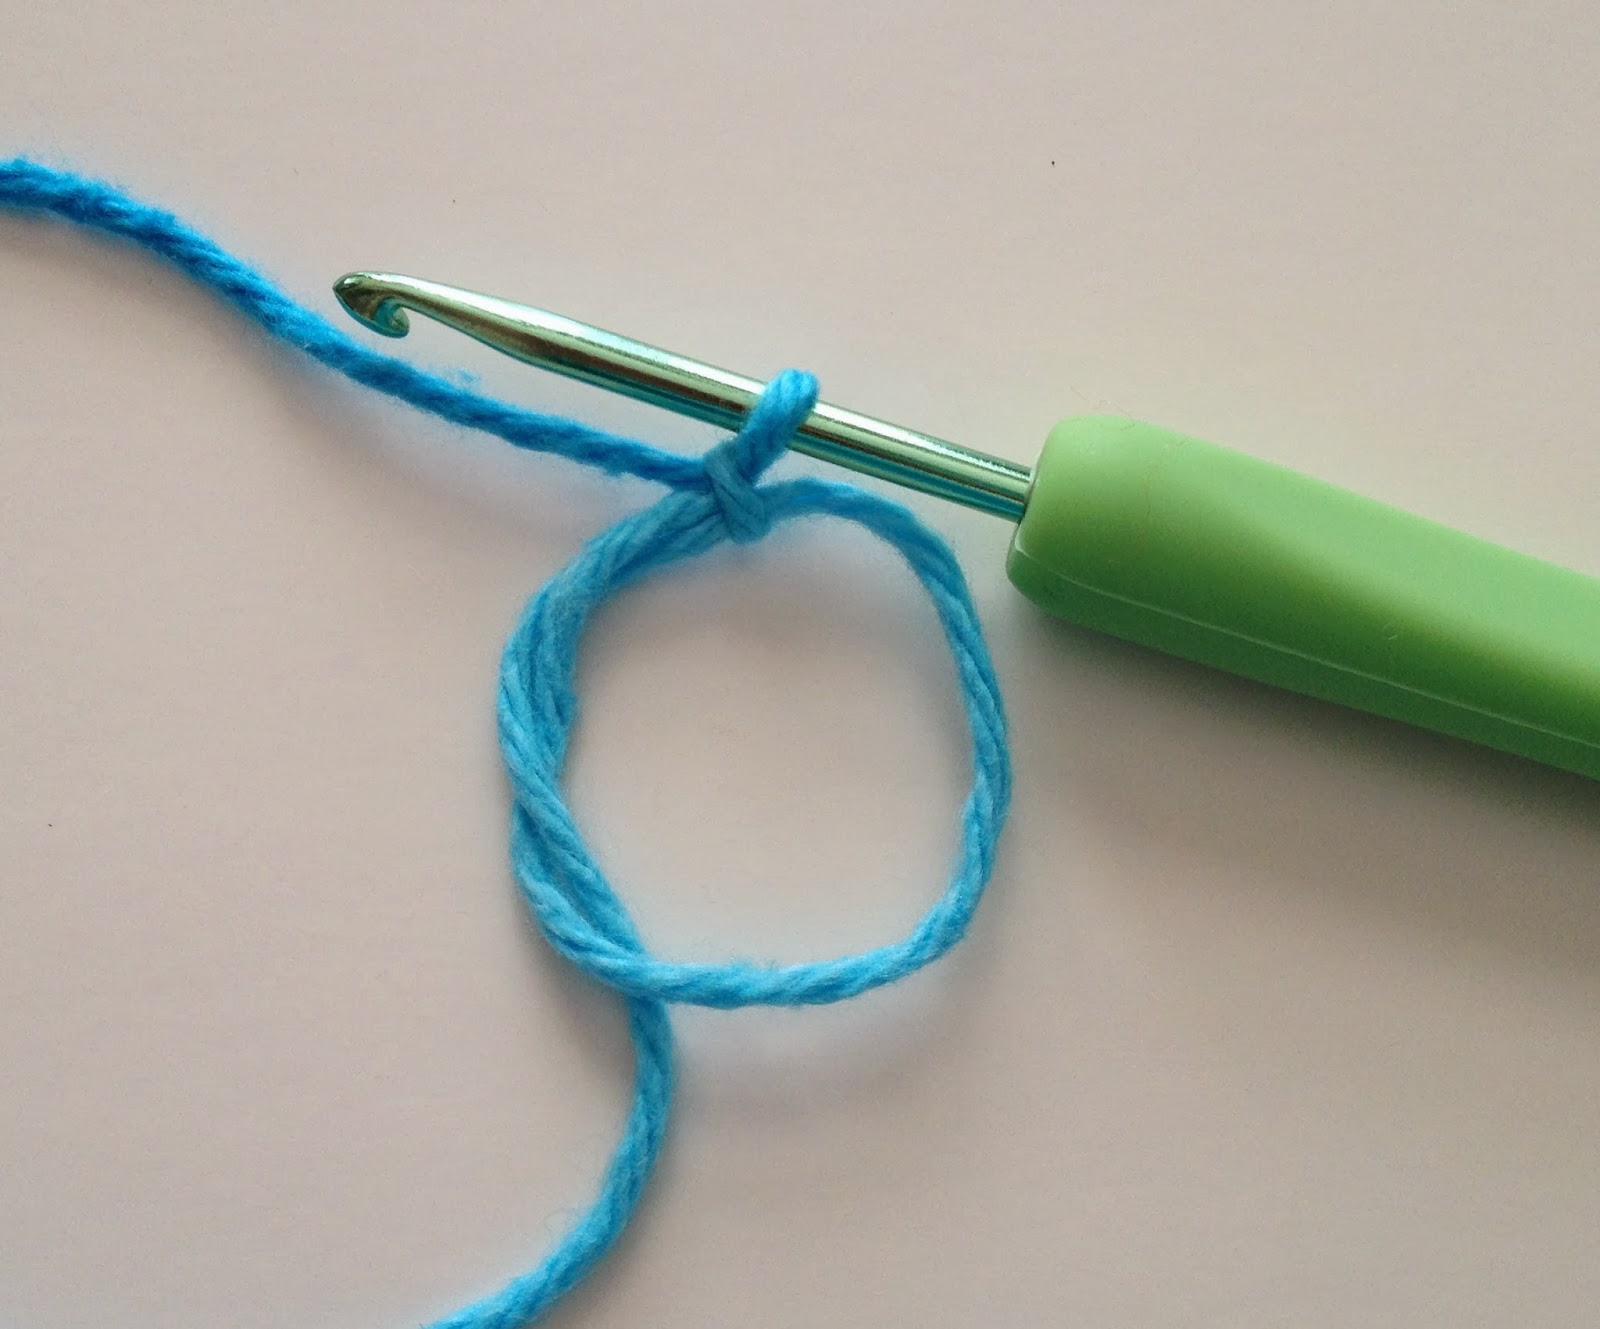
- Make a MR and ch 1. (this ch does not count as st)
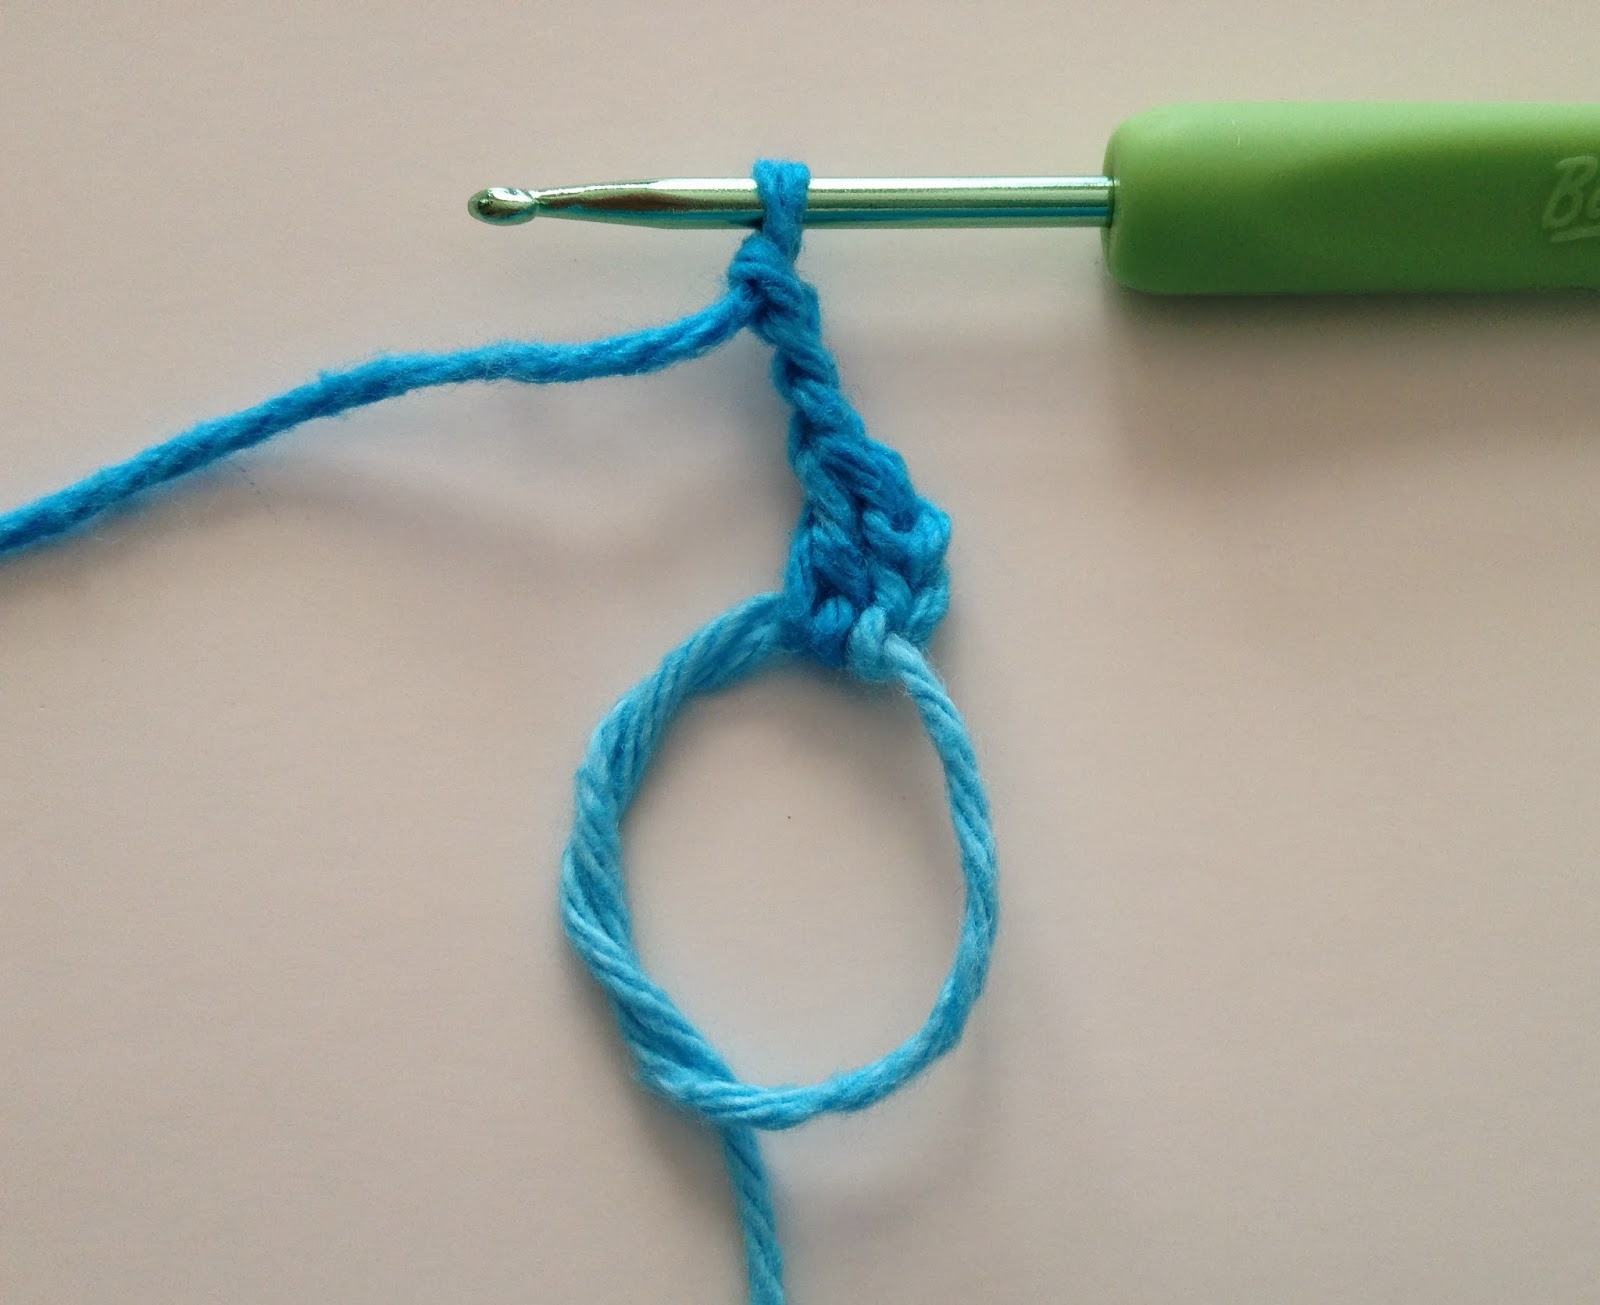
- Round 1: 12 dc into MR, sl st, ch 1. (12 sts)

- Round 2: 2 dc in each st all the way around, sl st, ch 1. (24 sts)

- Round 3: [1 dc in next st, 2 dc in next st] repeat [] all the way around, sl st, ch 1. (36 sts)
- Round 3: [1 dc in next st, 2 dc in next st] repeat [] all the way around, sl st, ch 1. (36 sts)

- Round 4: 1 dc in each st all the way around,

Instead of sl st and ch 1 at the end of Round 4, do the jogless color change method #2 (instructions found here). Follow that method exactly, except use dc instead of sc. Here are a few pictures illustrating that method:

- Round 5: 1 dc in each st all the way around,
The last st of this round can be a little confusing because the cut yarn ends from the color join can loosen, so just pull both ends to keep the st tight that your last st of Round 5 goes into. Make sure the last st of Round 5 goes in the st that is in the circled area in this picture:

sl st, ch 1. (36 sts)

- Round 6: 1 dc in each st all the way around, sl st, ch 1. (36 sts)

- Round 7, 8: Same as Round 6

Front Flap
The front flap is worked in rows, not rounds
- Row 9: 2 dc in next st, 1 dc in next 4 sts, 2 dc in next st, 1 dc in next 4 sts, 2 dc in next st, ch 1. (14 sts)

- Row 10: 1 dc in each st, ch 1. (14 sts)
- Row 11-21: same as Row 10.
The front flap will consist of 13 rows at this point.

- Row 22: 1 sc in next 3 sts, 1 hdc in next st, 1 dc in next 6 sts, 1 hdc in next st, 1 sc in next 3 sts. (14 sts)

- Cut the yarn, and sew in ends.
The finished front flap should look like this:

The Rest of the Slipper
There is a total of 25 sts that are left unworked on Row 9 from the original rounds that made the toe part of the slipper.
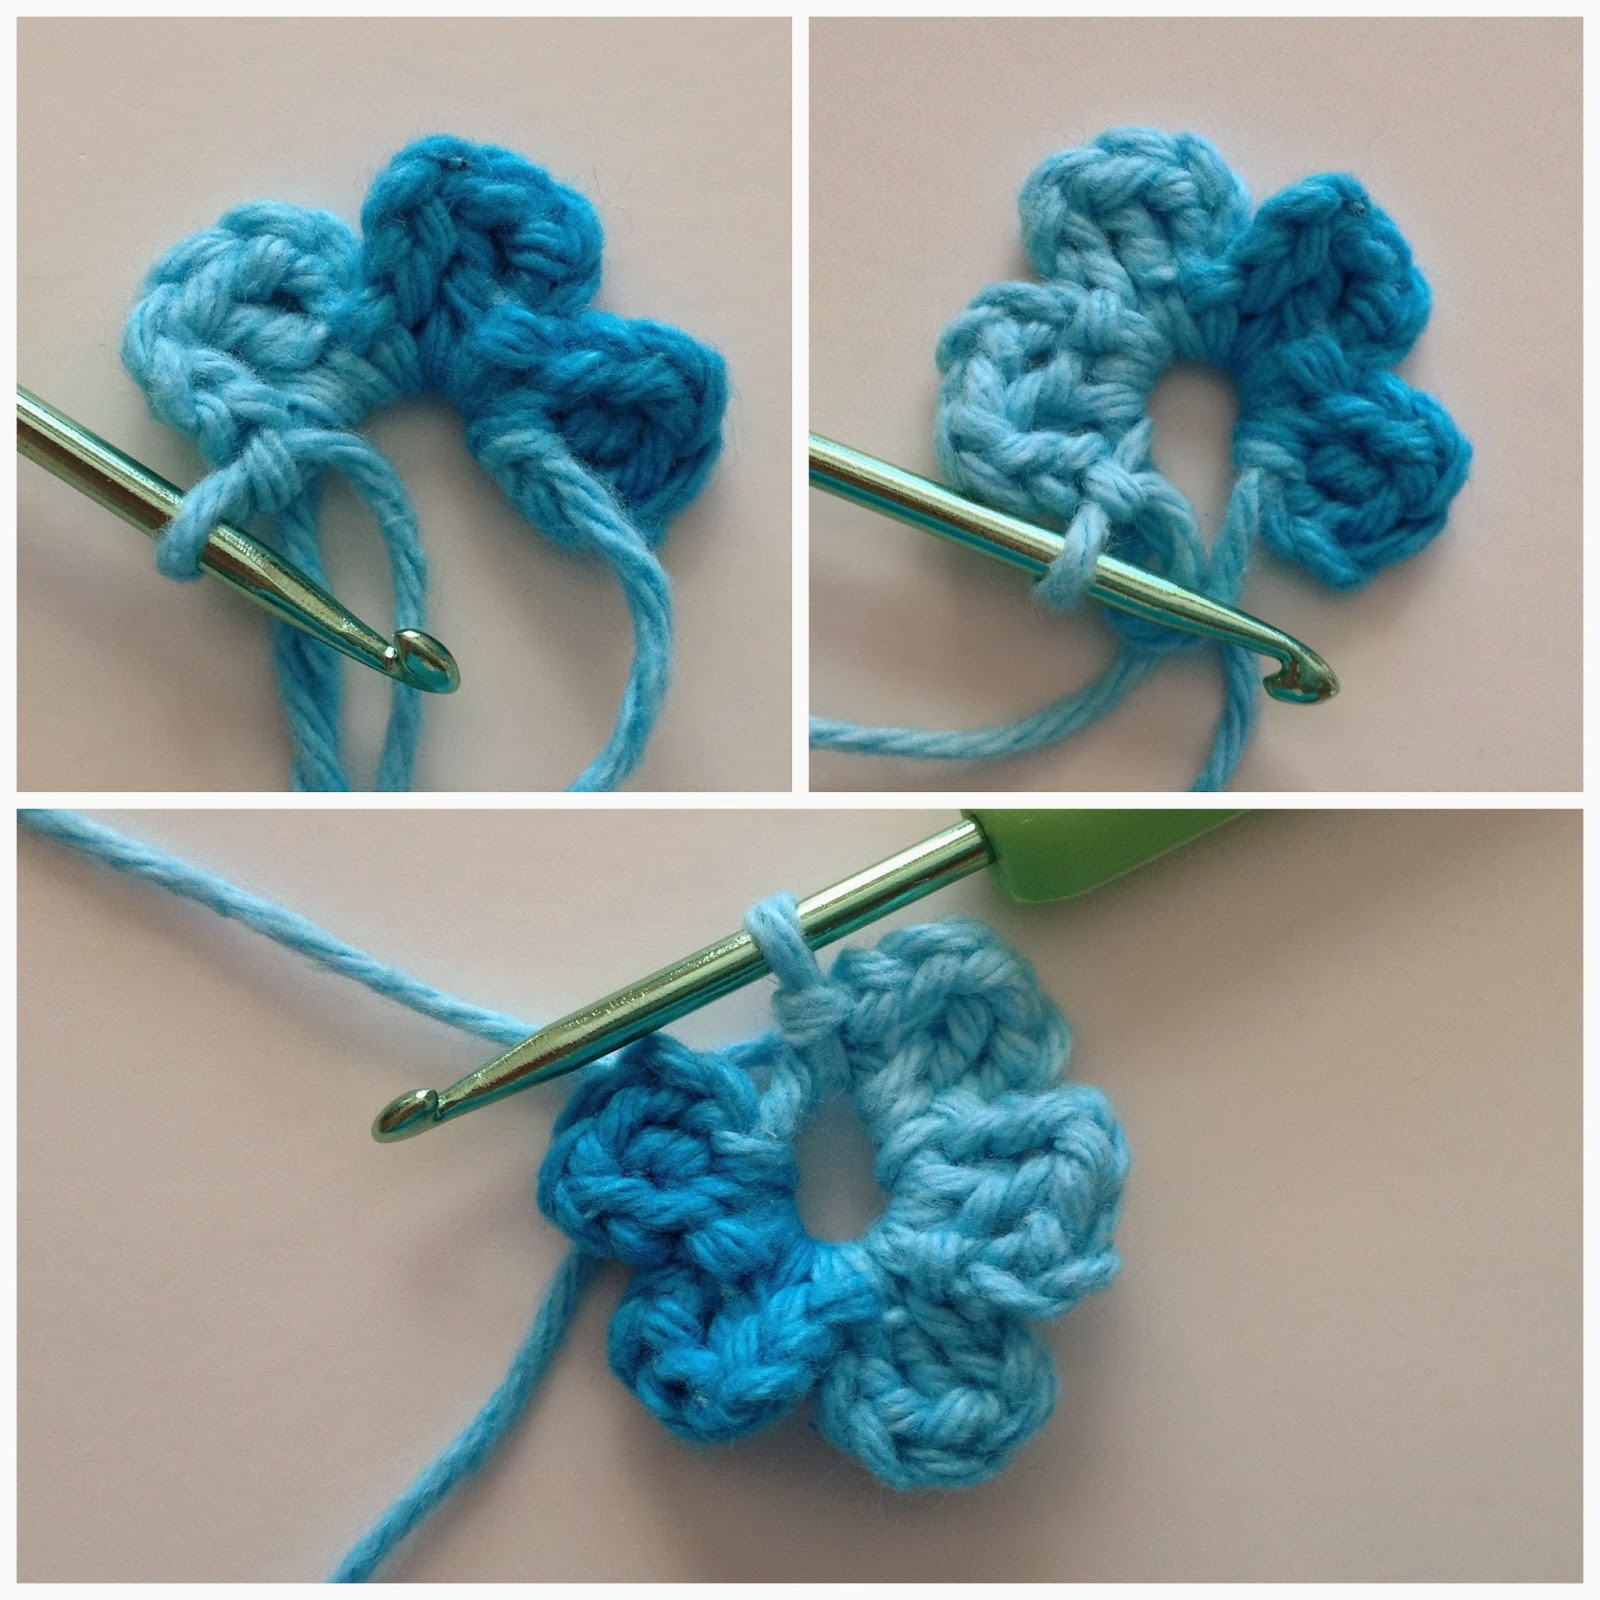
- Remainder of Row 9: Fold the slipper in half (pic 1), pull up a loop (pic 2), ch 1 tightly (pic 3), dc in the same st that has the ch 1 (pic 4)

1 dc in each st all the way to the other side of the front flap, ch 1. (25 sts)

- Row 10: 2 dc in first st, 1 dc in each st until last st, 2 dc in last st, ch 1. (27 sts)

- Row 11: 1 dc in each st, ch 1. (27 sts)
- Row 12: 2 dc in first st, 1 dc in each st until last st, 2 dc in last st, ch 1. (29 sts)
- Row 13: 1 dc in each st, ch 1. (29 sts)
- Row 14: 2 dc in first st, 1 dc in each st until last st, 2 dc in last st, ch 1. (31 sts)
- Row 15: 1 dc in each st, ch 1. (31 sts)
- Row 16: 2 dc in first st, 1 dc in each st until last st, 2 dc in last st, ch 1. (33 sts)
After Row 16, there are no more increase rows. At this point, there should be 8 rows since the rejoin from the edge onto the unworked stitches. The slipper should look like this:

- Row 17: 1 dc in each st, ch 1. (33 sts)
- Row 18-28: same as Row 17
At this point, there should be a total of 12 rows after the last increase row (Row 16), and a total of 20 rows since the rejoin from the edge onto the unworked stitches. The slipper should look like this:

- Cut the yarn, and weave in the ends.
- With the back portion of the slipper turned inside out and folded in half, align the back, or the heel of the slipper.

Take a yarn needle and a several inches of yarn and sew together the heel. I used a whip stitch, going in and out of aligning chain stitches on either side. This is what a few of whip stitches look like before they are tightened:

Once the heel is completely sewn up it should look like this:

- Row 11: 1 dc in each st, ch 1. (27 sts)
- Row 12: 2 dc in first st, 1 dc in each st until last st, 2 dc in last st, ch 1. (29 sts)
- Row 13: 1 dc in each st, ch 1. (29 sts)
- Row 14: 2 dc in first st, 1 dc in each st until last st, 2 dc in last st, ch 1. (31 sts)
- Row 15: 1 dc in each st, ch 1. (31 sts)
- Row 16: 2 dc in first st, 1 dc in each st until last st, 2 dc in last st, ch 1. (33 sts)
After Row 16, there are no more increase rows. At this point, there should be 8 rows since the rejoin from the edge onto the unworked stitches. The slipper should look like this:
- Row 17: 1 dc in each st, ch 1. (33 sts)
- Row 18-28: same as Row 17
At this point, there should be a total of 12 rows after the last increase row (Row 16), and a total of 20 rows since the rejoin from the edge onto the unworked stitches. The slipper should look like this:
- Cut the yarn, and weave in the ends.
- With the back portion of the slipper turned inside out and folded in half, align the back, or the heel of the slipper.
Take a yarn needle and a several inches of yarn and sew together the heel. I used a whip stitch, going in and out of aligning chain stitches on either side. This is what a few of whip stitches look like before they are tightened:
Once the heel is completely sewn up it should look like this:

- The final step of the slipper is creating the area where you can thread the shoe laces through for a more "realistic" look. This part is a tiny bit complicated because it isn't exact, but it (thankfully) doesn't need to be exact! The end result will be a single crochet row all the way around the edge of the main portion of the slipper. The single crochet row starts at the edge of the front flap and the side of the slipper. In the picture below, there are arrows showing the direction to single crochet along the edge.

Just like before on the remaining unworked stitches of Row 9, stitch along the top edge starting at the edge of the front flap and the side of the slipper by pulling up a loop, ch 1 tightly, and then sc in the same st that has the ch 1.
Because the single crochets are being crocheted into the top edge of the stitches from the row below, there is not obvious spaces for the single crochets to go. What I did to help me see visually was pull a contrasting piece of yarn all the way through on either side, so that from where I started crocheting the single crochet row, to the pink thread, I attempted to have the same amount of single crochets in the the circled area on both sides so that the single crochets line up across from each other.

Having approximately the same number on either side makes threading the shoe laces a little bit easier, but just do the best you can because it isn't very noticeable in the end where you thread the shoe laces!
Converse Star Circle Emblem
- Make a MR and ch 1. (this ch does not count as st)
- Round 1: 8 hdc in MR, sl st, ch 1. (8 sts)

- Round 2: 2 hdc in each st all the way around, sl st, ch 1. (16 sts)

- Round 3: [1 hdc in next st, 2 hdc in next st] repeat [] all the way around, sl st, sl st, cut yarn and weave in ends.
On round objects I like to sl st twice because it seems to finish off a bit more gradually and not have a lump on the side. That is completely optional though, you do not have to sl st twice.

- With your slippers folded in half, take the converse star circle emblem and place it on the slipper. (KEEP IN MIND that when you are placing the converse star circle emblems, they are going to be on the outer sides of each slipper but they will not be on the SAME outer side on both slippers, they are on opposite sides. Just keep that in mind when placing them, because you don't want to end up with two right slippers or two left slippers!)

- With white yarn, sew around the edge if the converse star circle emblem. Make it as even as you can, but you cannot see it from the front so it doesn't have to be perfect. This is the what mine looked like from the back:

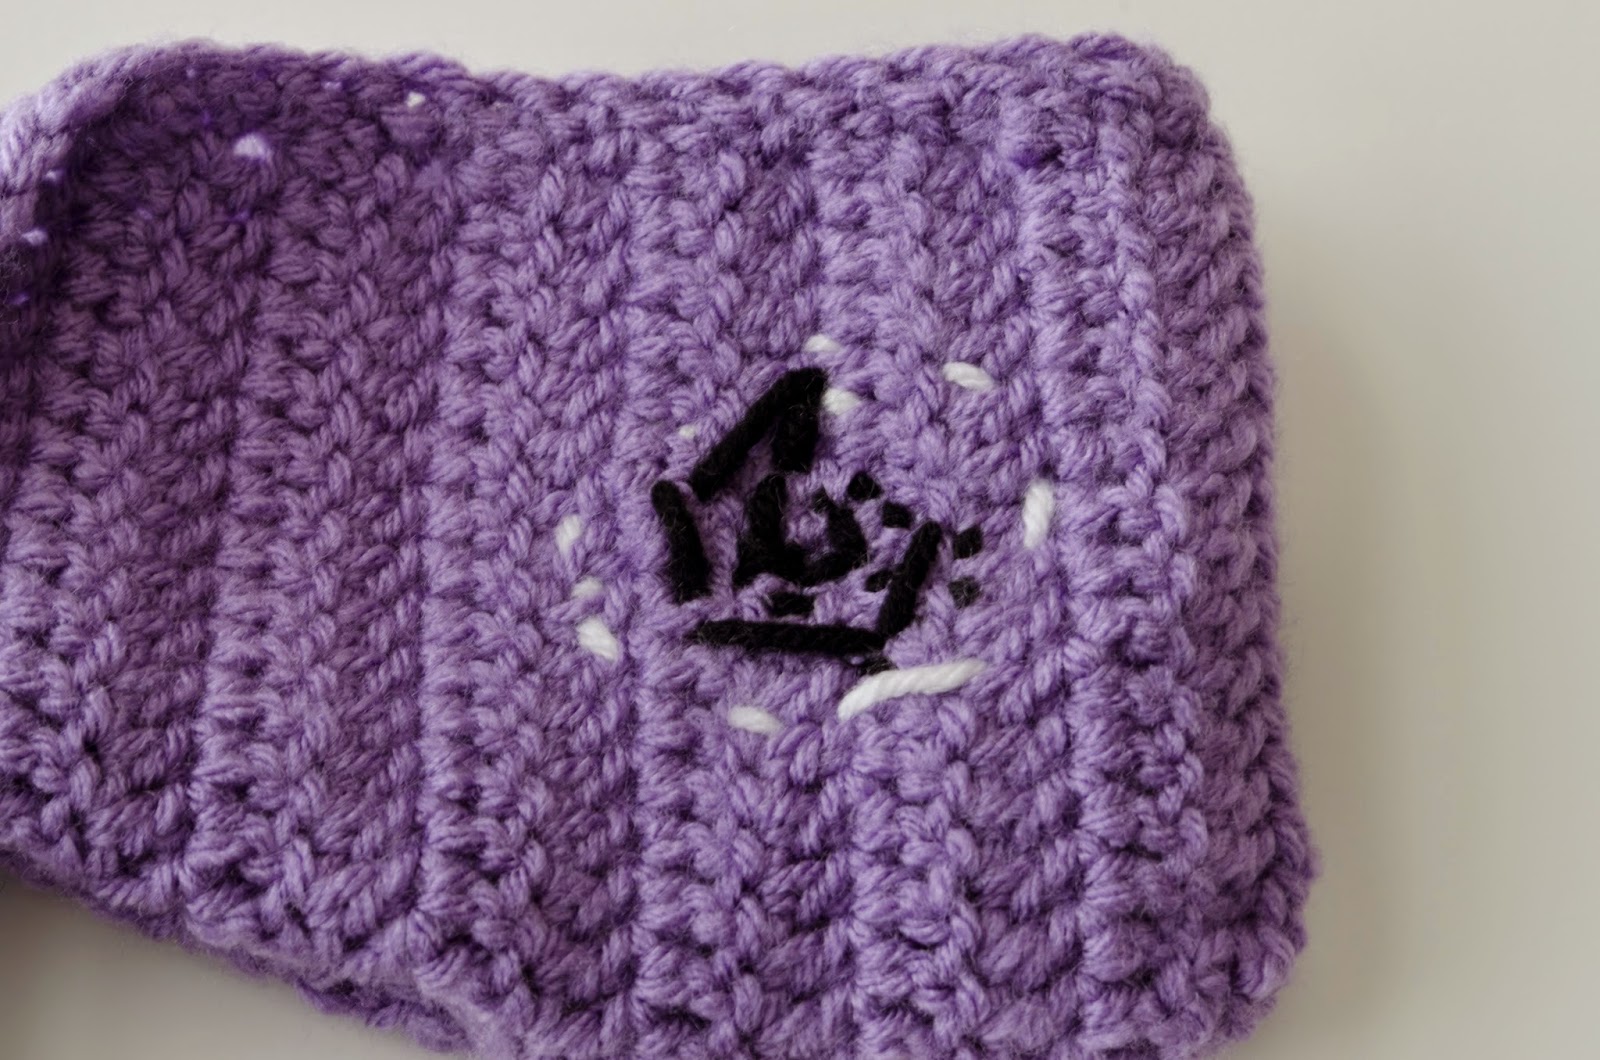
- With black yarn, sew with the whip stitch (or back stitch) a star on the converse star circle emblem. I had to practice it a few times before I got it to look the way I wanted it to. This is what it ended up looking like:

And from the back:
Once the instructions are repeated, you have your finished set of comfy cozy Converse slippers! Here are some finished photos. They are a little hard to take pictures of without feet in them, so they end up looking a little round. But you get the idea ;)


Hope this pattern works for you! All the sections are easily adjustable for multiple sizes by eliminating increase rows and replacing them with straight rows or just eliminating increase rows with no replacements. If anything isn't clear or if there are any questions, feel free to ask!


